Customised Word Document and PDF Reports
Creating a Customised Report in a Word Document
The following section explains how you can take the standard Word PDF report that is generated from a session when you export a report, and customise the report so that it is styled the way you want it to look.
By default when you export a session to PDF, using Word setting, it will look similar to the report below.

This standard report exports all of the session values in a very simple and standard tabular format.
In order to customise the report you can create a Word template which will be used to take the data from the session and create a custom report.
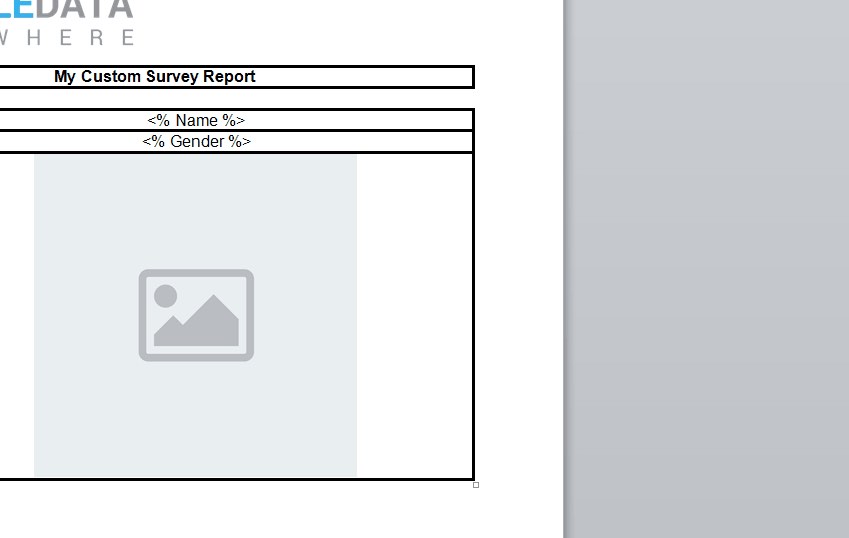
Below is an example of a customised report in PDF Format.
To get started with the base Word template, you can export the session to Word, which will give you an idea of what the standard report template looks like in a Word document. It will look like the example Word document below.
You can download an example from here .
Once you have the standard template you can start to customise the report to your liking.
Inserting point values
Whenever Mobile Data Anywhere detects a tag of the form <% NameOfPoint %>, it will replace the entire tag with the value of the named point (which in this case point ID Name was NameOfPoint), taken from the data of the session being processed.
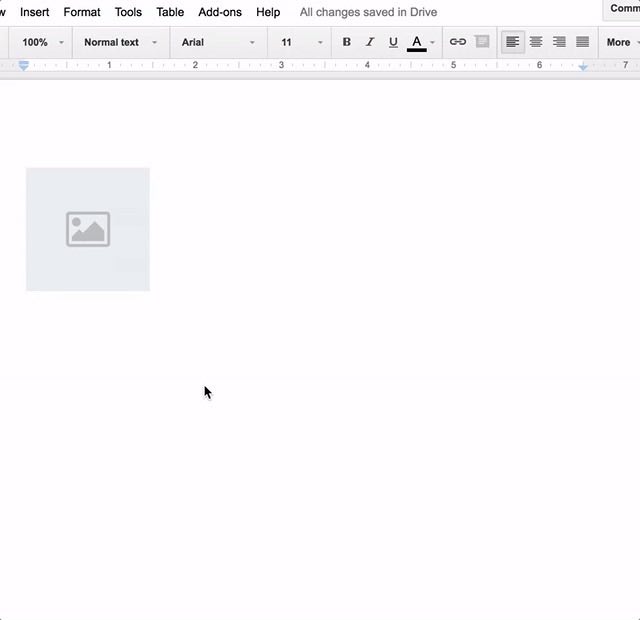
Inserting image points
Image points such as Camera and Sketch points can be inserted into the report by inserting a placeholder image and setting the image's alt text to be the point ID. A placeholder image can be downloaded by clicking here . See below for an example on how to set the alt text in Microsoft Word and Google Drive.
Microsoft Word
Google Drive
When the report is generated, the placeholder images will be replaced with the camera photo or sketch from the session. If the session does not contain a photo for the point, the placeholder image is removed. When a session image is inserted into the report, the image will be placed within the bounds of the placeholder's height and width. This allows you to control the height and width of the report's images by adjusting the size of the placeholder image within the report template.
Using Word templates, fully formatted reports for printing can be generated automatically by Mobile Data Anywhere using a custom template designed for the project.
Once customised the Word document will look like the example below.
You can download an example from here .
Once you have created the custom Word template you will need to upload the template to the Word section on the Project Options page.
Go into the Project list, view the Project and press on the Options tab. Once in the Options Tab expand the Word options section.
Tick the Format with a template checkbox, upload the template file and press the Save Options button at the bottom of the page.
You can also customise the filename of the report that is generated from the Project options tab.
In the File Name section you can specify what the filename will be set to for each session being exported. It is useful therefore to include variable 'placeholders' in the filename that will evaluate to a unique name for each data set. The available variables are:
%pointIDname% - data from the session, associated with a point
%.guid% - a globally unique identifier used for tracking purposes.
%.time% - the time (HH-MM) the data was saved.
%.date% - the date (YYYY-MM-DD) the data was saved.
%.unitID% - the Unit ID of the origin mobile device.
While to some extent these are advanced features, they can be very useful for everyday use for naming systems for files associated with a session. For example: Filename: %NameDriver% %Road% %.date%.docx delivers - Jim Hall Coast Hwy 2015-09-22.docx
Create powerful mobile forms for your business in minutes
